Metal roofs offer a ton of advantages over the traditional asphalt shingles. They are durable, lightweight, and when they are properly installed, they can last as much as three times longer than shingle based roofs. Some metal roof styles can provide the benefits of a metal roof while keeping the looking of a traditional roof.
They are also more energy-efficient. In sunny climates, they absorb a lot of the extra heat, so you’re AC won’t have to work as hard to keep things cool inside. They can better withstand wind, fire, and heavy snowfall than traditional shingle roofs.
They are also a great choice if you want to install a San Diego home solar system. When properly maintained, solar panels can last up to 40 years. Under perfect conditions, shingles only last between 20-30 years, depending on what they are made of. Asphalt shingles may need replacement as soon as 12. If you install solar energy to your home, you’ll need to remove the solar panels in order to replace your roof, which will add time and labor to the project.
Some things are best left to the experts. Improper cutting techniques can bend and warp your metal or damage the galvanized zinc coating. This can lead to leaks and structural damage. An experienced roofer will know how to cut metal roofing to fit valleys and install flushing on any pipes without the risk of leaks.
Most homeowners probably don’t have the tools that professional roofers would use to cut metal roofing, and they cost hundreds of dollars. Still, there are cheaper tools you can use to cut metal roofing panels, but you need to be mindful of safe practices when you’re working with metal.
Using Proper Safety Equipment
It’s very easy to cut yourself when you’re working on metal roofing. You’ll need to wear cut resistant gloves at all times when you’re cutting or handling metal roof panels. You’ll also need safety goggles to protect your eyes from metal shards as you cut.
Professional roofers take every precaution to keep themselves safe when they’re working on a roof. If you do choose to walk your roof on your own, you should always wear rubber-soled boots for extra traction, and make sure you use the proper ladder. It needs to be firmly braced or tied off, and it should be equipped with rubber safety feet.
A professional roofer will install toe boards and roof brackets to keep them safe when working on your roof. They also will have the expertise to remove them without causing permanent damage to your home. California state law requires all contracts to use a fail restraint system on sloped roofs where the fall height is greater than 7 ½’. Any roofer working on your house will be using safety harnesses to prevent severe injury from falling off a roof.
Once that you’re ready to work safely, it’s time to consider the right tool for the job.
Using Aviation & Tin Snips
There are a few kinds of metal hand shears that are designed to cut through sheet metal. Tin snips are similar to scissors—they have a single pivot point. A good set made of hardened steel can last for decades, but they require more effort to use, and they aren’t suited for some of the thicker gauge styles of metal roofing. They also can’t cut along corrugations, only across them.
Aviation snips have two pivot points and are spring-loaded to take some of the burden off your hands. They are color-coded so you can quickly identify the right one for your cut. The yellow handled ones are designed to make short, straight cuts—perfect for making notches. The red-handled ones are for right-handed cuts, and the green-handled ones are for making left-handed cuts. The red and green ones will be the ones you use most frequently to cut metal, and it will help a lot to understand how they work before you start cutting.
Both the red and green aviation snips are designed to curl the excess material. The red ones are meant for trimming metal off the right-hand side of a panel, and the green ones are for trimming the left-hand side of a panel. They aren’t designed to trim large portions of material all at once, and using them like this can warp your panels.
If you need to make a large trim, first take your measurements and mark the place you need to cut. Then, start with a rough cut about a ½” away from your mark. Though it will add more work to your job, your final cut will be much cleaner and straighter.
While you’re cutting, you need to make sure the blades stay level with the metal at all times. Snips are designed for short, quick cuts versus long cuts. Each snip of the handle should only be going through about ¼” of material. Longer cuts can cause dimpling and are more likely to produce a jagged edge.
Because aviation snips are not really designed to make the long cuts required for metal roofing panels, you may wind up bending your material. In order to offset this, you can make alternating cuts with a left-handed and right-handed snip. To do this, first, measure your cut, and then line up your rough cut with your left-handed snips. Space your right-handed snips about a ½” away, and alternate each snip about every 2”. You’ll essentially be cutting a thin strip of metal out of the metal panel, and in the process protect your cuts from warping.
Power shears take a lot of labor out of the process, but they have a couple of drawbacks. It’s much harder to make controlled curves with them, and it’s very easy to go too fast when you use them. For most homeowners, they are probably not worth the extra investment—you’ll likely still need a set of aviation snips to make round or angled cuts. And just like tin snips, you can’t use them to cut along corrugations.
Nibblers
A nibbler is the most efficient and effective way to cut metal roofing panels. It is easy to maneuver for curved cuts without getting jammed. A nibbler works much like a jigsaw, only there’s no table under the material you’re cutting. When using it, you should always keep the nibbler parallel to the material you’re cutting so it doesn’t bind. On visible edges, it’s usually a good idea to make a rough cut with a nibbler and use aviation snips to do a final cut.
Professional roofers will use high-end nibblers to cut a metal roofing panel. While you can get a cheap nibbler, they are often poorly designed. The handle design might be uncomfortable to use for a big job, or it may curl the metal inefficiently. They may also not be rated for the cutting radius you need for curved cuts.
Even if you’re able to invest in a high-quality nibbler, there are still plenty of pitfalls. Nibblers work by punching out small bits of metal as they go. This process also works to wipe the protective coating down across the cut, which will prevent corrosion. But the metal bits tend to fall to the ground and can get stuck in your boots if you’re not mindful. If you’re walking across your panels while you work, this will scratch up the roofing and lead to corrosion.
Tools to Avoid When Cutting Metal
DIYers often use a circular saw equipped with a metal cutting blade to cut through sheet metal. Most roofing materials have manufacturers warning advising you not to do this for metal roofing panels. That’s because a saw blade designed to cut through metal will use an abrasive blade that can melt through the protective coating. They are also prone to leaving small burrs on the edges. While you can smooth them out and apply a protective coating, it’s not ideal.
A circular saw will also toss bits of hot metal that stick to the surface of the panel. This will make your roof very susceptible to rust and corrosion. As rust eats through your roof, you can develop a leak or major structural damage to your roof.
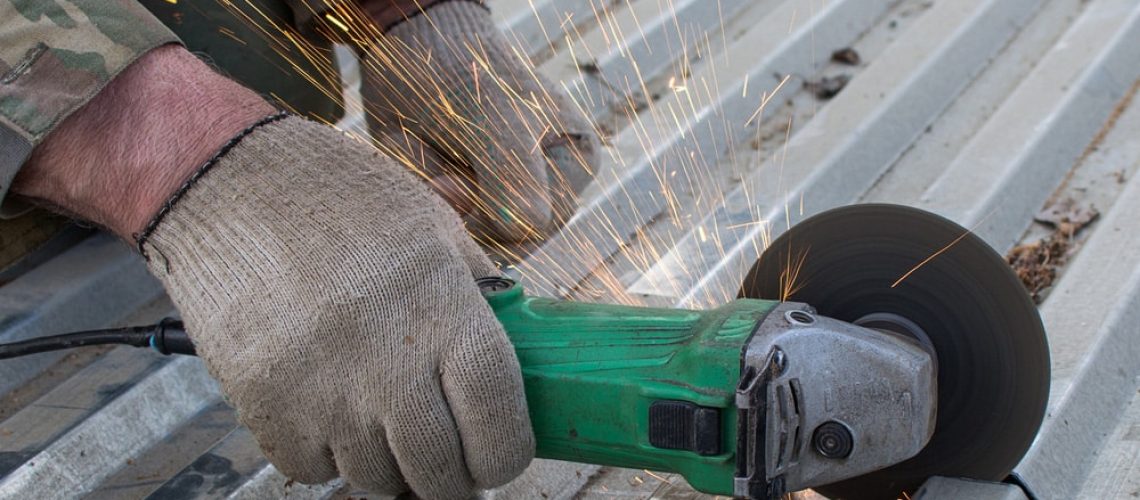
An angle grinder has the same issues, and they are also incredibly dangerous to use. On top of that, they can leave extremely sharp edges where they cut. Because of the risk of injury and the damage it might do to your roofing panels, it’s best to steer clear of an angle grinder for this job.
Leave it to the Pros
Even if you’re able to make straight, clean cuts in your roofing panels, the process of installing them is complex. If you choose to install a metal roof over shingles without an expert inspection, you may miss signs of structural damage that require a total tear-off to repair.
An experienced roofer can avoid common mistakes while cutting the panels, installing flushing, and placing the panels. They are also trained in safe practices and much more efficient. Your job will be finished sooner and better, without putting you or your family at risk. And the best roofers are willing to back all of their work with a guarantee. In the long run, this will save you a lot of time and money, and it’s a much safer choice for you and your family. Take a look at the average metal roof cost if you are interested in how it will fit your budget.
Professional roofers also have warranties and insurance policies to cover damage and any injuries. If you install your own roof, your insurance policy will likely cite negligence and refuse to cover damages that result from any mistakes you made.
With a metal roof, you can expect double the life expectancy from an asphalt shingle roof, at minimum. But they still need proper maintenance. Metal has a tendency to flex and expand as the weather changes, and this can loosen the screws on your roof. A professional roofer can perform routine maintenance twice a year to check for corrosion, retighten screws, replace any gaskets, and touch up areas with sealant.
At Preman Roofing Solar, we have decades of experience to ensure a proper installation. We also value your time. All of our timelines and work schedules are guaranteed—so you know exactly when to expect us and how long it will take before we are out of your hair. Contact us today for more information about our roofing installations and financing options. Be sure to also inquire about our residential and commercial solar panels in San Diego if you need them for your metal roof.


