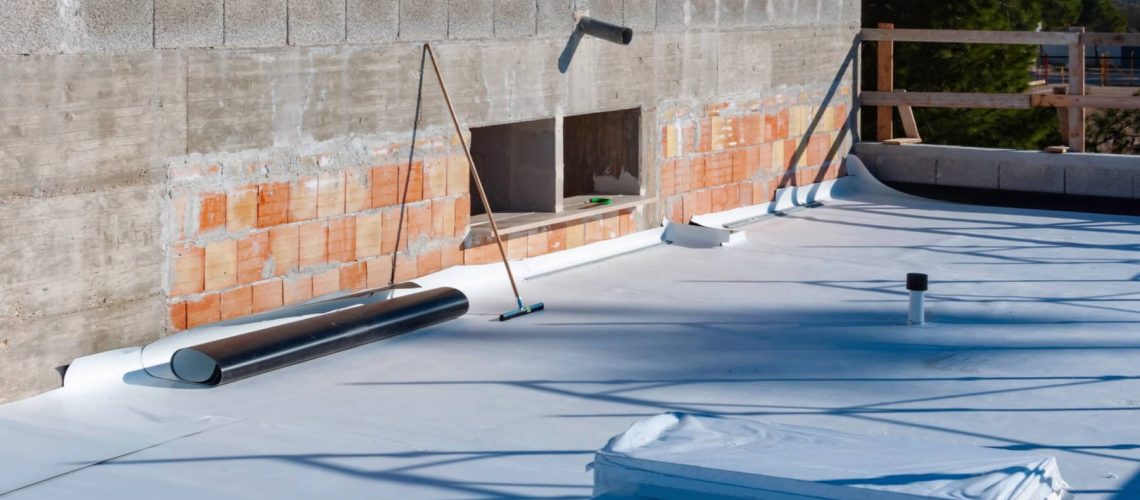
Thermoplastic polyolefin systems use a single ply roofing membrane to create a watertight seal on your roof. This roofing system has grown in popularity since its first installation in 1986, and it is quickly becoming one of the most common new installations for flat residential or commercial roofing. TPO is easily recognizable by its distinct, bright color and celebrated for its many advantages. Now that we’ve answered, what is TPO roofing, let’s get into its advantages and how to install TPO roofing.
Advantages of TPO roofing
TPO roofing is puncture, tear, and wind-resistant, making it a good choice for areas with heavy storms and high winds. It is also capable of reflecting nearly 90% of the sun’s UV rays, which can lower your cooling bill significantly. Despite the name, thermoplastic membranes don’t have any plastic in them, and they are environmentally friendly to produce and easily recyclable.
These sturdy roofs offer an affordable option that can last up to 30 years without replacement or much roof maintenance. A TPO roof doesn’t require washing, resists corrosion, and won’t promote the growth of moss, algae, or mildew. Hail typically bounces right off of it, and you can choose thicker membranes to allow you to walk on it safely. It also comes in a variety of colors, including the standard white, tan, or grey. Premium colors cost more but allow you to improve your roof’s look when it is visible.
TPO is an alternative to EPDM rubber roofing. In regard to what is EPDM roofing, it is a synthetic roofing material known for its durability. The major advantages TPO offers over EPDM roofing are better UV reflection, increased resistance to punctures caused by foot traffic and falling debris or hail, and stronger seams. During TPO roofing installation, a hot-air gun is used to weld the membrane at the seams. This action ensures you’re much less likely to develop a leak, which is a notorious issue with flat roofing.
TPO roofing is often more affordable than EPDM roofing installation. While you can purchase an EPDM roofing system designed to reflect light, it is more costly, and even the cheapest TPO roofing material will bounce UV rays effectively.
Installing TPO roofing
TPO roofing requires tools and experience to install correctly. When you need a new roof, it’s always best to work with an experienced professional roofer. If something goes wrong during a DIY roof installation, insurance likely won’t cover it, and you can have some costly repairs to worry about. A roofing contractor can also use a thermal scan to evaluate your existing roof for moisture buildup and help you determine if you need a total tear-off or can install your TPO membrane over existing metal roofing. The process for how to install TPO roofing system looks a little like this:
1. Preparing your roof
To prepare your roof for membrane installation, you will need to either remove the existing roof or clean the existing substrate and add insulation. The three main types of insulation are polyisocyanurate, expanded polystyrene, and extruded polystyrene. Balancing the price and the amount of insulation they require is crucial, and you can consult your current cooling bill to get an idea of which insulation to choose.
This insulation will protect your roofing membrane from water vapor and increase your energy efficiency. The installation can be fastened in place, but the fasteners create holes throughout the insulation that will reduce its effectiveness. To combat this, you can layer the insulation and use different attachment points to reduce airflow through the holes.
Next, you’ll place a cover board to attach your membrane to. Most installations should use ⅝” plywood or OSB, and you will need to sand down any sharp edges before attaching the membrane.
2. Installing the membrane
TPO roofing comes in a variety of thickness, between 45 mil and 90 mil. While 60 mil is the most common, a roofer can help you decide which thickness will work best for your particular situation. The membrane can be installed with either mechanical fasteners, bonding adhesive, or a ballasting system. A fully adhered roof has adhesive across the membrane’s entire surface area to prevent air bubbles and shifting, but it takes longer to install.
Mechanically attached membranes have a quicker installation time, but because of the space between fasteners, they can develop pockets of moisture that can damage your roof and the structure of your building over time.
Once the membrane is installed, the seams are sealed with heat guns. A good seal will require a lot of patience and practice. The heat gun should be used at the lowest setting sufficient to melt the seam, and welder drag needs to be avoided to preserve the surrounding membrane.
3. The final touches
With the TPO membrane fully installed, you will need drip edges to guide water to your gutter system. Without good drainage, your roof can hold water and develop leaks. Improper drainage can erode the foundation and cause structural issues with your building.
Vents, chimneys, and other protrusions need special care. Flashing will prevent water from penetrating the membrane and causing water damage throughout your building. Additionally, every space where three membranes overlap will require T-joints.
Get in Touch with the Experts
Preman Roofing Solar is a San Diego roofing company that has installed and maintained thousands of roofs in the area since 1999. We have a team of experts on staff to provide commercial and residential roofing installations and repairs. We can guide you through the process of selecting new roofing material and discuss the advantages and disadvantages of each choice. Contact our office today for a free quote, and learn more about TPO and other flat roofing options.


